
Diagnostics projects are used to identify configuration issues with instances and databases. One of the main functions of a diagnostics project is to find problems with database indexing – missing indexes, fragmented indexes and unused indexes.
Creating a diagnostics project
A diagnostics project defines the instances and databases to be diagnosed. To create a diagnostics project, do the following steps:
- Select Diagnose from the navigation menu.

- Select Create new project from the project dropdown and give the project a name.

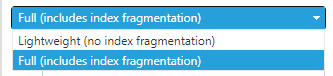
- Select Lightweight or Full from the project type dropdown, depending on whether you want to include index fragmentation or not.
- Drag one or more databases into the database box (or drag instances into the instance box if you want to diagnose all databases in that instance).

- Click Save.
Schedules can now be added to project.
Creating a schedule
A diagnostics project may contain one or more schedules. A schedule defines when the diagnostics are run. To create a new schedule, do the following steps:
- Select Add new schedule from the schedule dropdown and select a schedule type.

- Name the schedule.
- Select when the schedule is run. The options will depend on the schedule type you selected.
- Click Add.
- The scheduled runs will appear in the grid below. Their status will change from Waiting to Completed once the run has completed.

Existing schedule runs can be deleted by clicking on Delete. This will not affect other scheduled runs.